Investing in a solar energy system is a brilliant move for both your wallet and the planet. But like any high-performance asset, your solar panels require consistent care to deliver maximum returns and ensure a long, productive lifespan. Neglecting routine maintenance can lead to a gradual loss of efficiency, create potential safety hazards, and result in costly, unexpected repairs down the line. A small drop in energy production might seem insignificant at first, but over months and years, it can add up to a substantial loss in savings and environmental benefits.
To ensure peak performance and longevity, understanding the critical role of checklists in maintaining complex systems is vital for any equipment owner. This comprehensive solar panel maintenance checklist is designed to simplify that process. We break down the six essential areas you must monitor, from simple visual inspections to detailed performance analysis. Following these steps will protect your significant investment and guarantee your system operates at its full potential for decades. This guide will walk you through what to look for, when to call a professional, and how to track your system's health, ensuring you get every watt of clean energy you paid for.
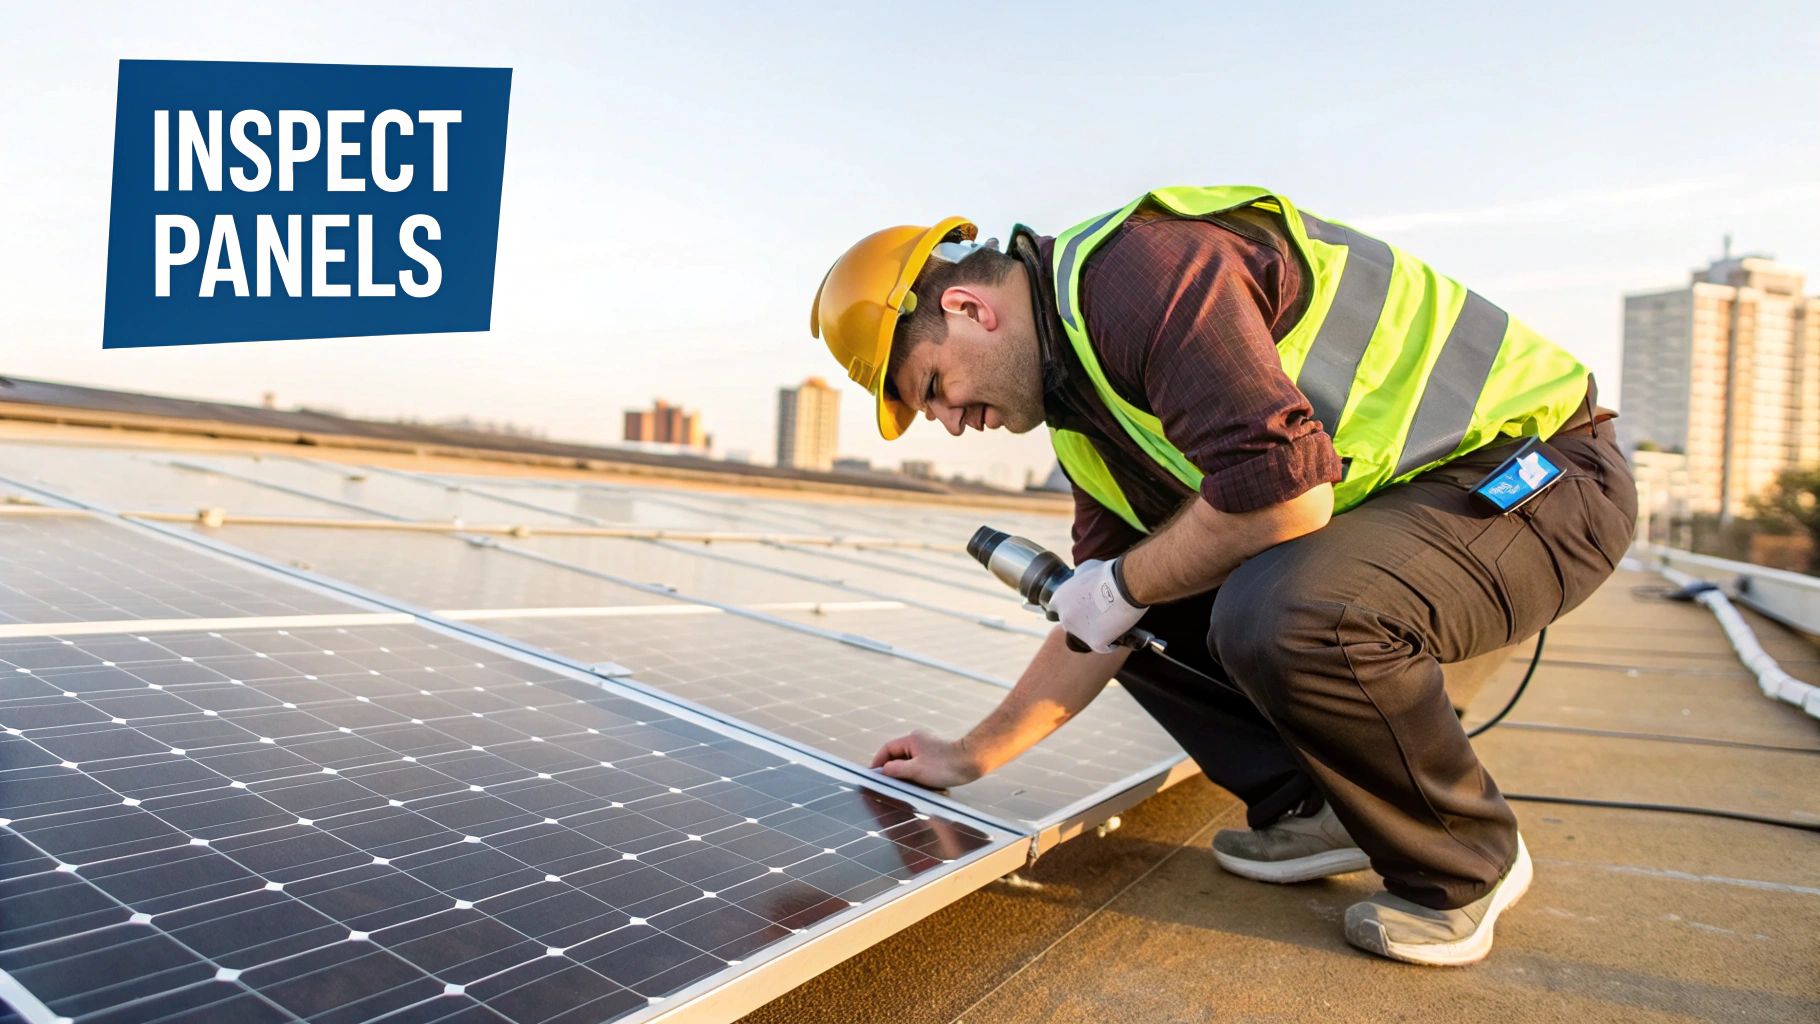
1. Visual Inspection for Physical Damage
The first and most fundamental step in any effective solar panel maintenance checklist is a thorough visual inspection. This proactive measure involves a detailed examination of your entire solar array to catch minor issues before they escalate into costly repairs or significant energy production losses. A consistent visual check is your primary defense against environmental wear and tear, ensuring the longevity and safety of your investment.
This inspection isn't just a quick glance; it's a comprehensive survey of every component. You should be looking for any signs of physical harm to the panels themselves, the mounting structure that secures them, and the visible wiring that connects everything. Early detection of issues like cracks or loose bolts can prevent water intrusion, electrical faults, and reduced efficiency, making this a critical, non-negotiable task for every solar owner.
What to Look For During Your Inspection
Your visual check should be methodical. Create a systematic process to ensure nothing is missed, examining each part of the system for specific types of damage.
- Panel Surface: Look closely at the glass surface of each panel. Identify any cracks, chips, or deep scratches. Severe weather, like hail or falling debris from trees, is a common culprit. Even small cracks can allow moisture to seep in, which can lead to delamination, corrosion, and eventual panel failure.
- Frame and Mounting: Inspect the metal frames around each panel and the racking system holding them in place. Check for signs of corrosion, warping, or loose bolts and clamps. The structural integrity of the mounting hardware is crucial for withstanding wind and other environmental stresses.
- Discoloration and Hot Spots: Pay attention to any unusual discoloration on the panel's surface. Brown or burn-like marks can indicate "hot spots," which are localized areas of high temperature and resistance. These are serious issues that drastically reduce a panel's output and can pose a fire hazard.
- Electrical Connections: While avoiding direct contact with wiring, visually inspect the visible cables and junction boxes. Look for frayed insulation, chew marks from pests, or signs of burning around connection points. Secure and intact wiring is essential for both safety and system performance.
Implementation and Best Practices
To integrate this task into your routine, aim for a frequency that matches your environment's risk level. For example, Tesla Solar often recommends homeowners conduct monthly visual inspections, while large-scale commercial operations like the Topaz Solar Farm perform them weekly due to the massive scale and investment.
Pro Tip: Use a pair of binoculars for a safe, ground-level inspection if accessing your roof is difficult or hazardous. This allows you to get a clear, close-up view of each panel without needing a ladder.
Always document your findings. Take clear, dated photographs of any potential issues you discover. This creates a valuable record that can be shared with a professional technician for assessment and is useful for any potential warranty claims. Performing inspections at different times of the day can also be beneficial, as the changing angle of the sun may reveal subtle cracks or surface imperfections that are otherwise difficult to see.
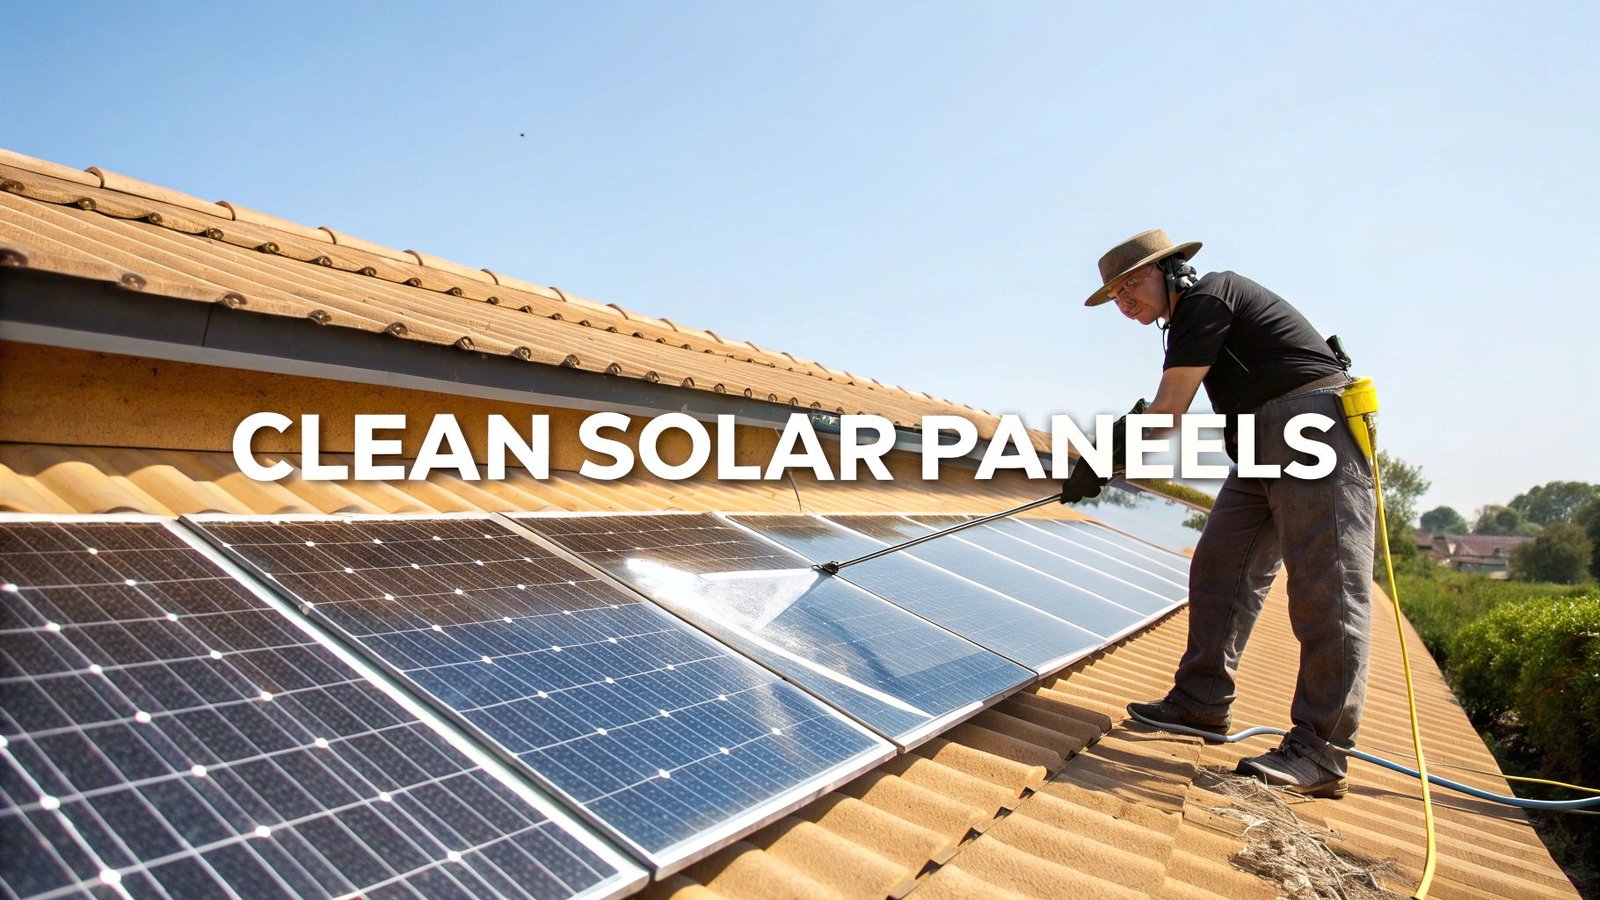
2. Panel Surface Cleaning
Following a visual inspection, the next critical task on any solar panel maintenance checklist is regular surface cleaning. This essential step involves removing the accumulated layers of dirt, dust, pollen, bird droppings, and other debris that inevitably coat your panels. Over time, this buildup acts as a film, blocking sunlight from reaching the photovoltaic cells and directly reducing your system's energy production and efficiency.
Proper cleaning is more than just an aesthetic touch-up; it's a direct investment in your system's performance. Even a thin layer of grime can lead to noticeable power loss, and neglecting this task can undermine the financial benefits of your solar array. By keeping the panel surfaces clear, you ensure they can absorb the maximum amount of sunlight, maintaining optimal output and guaranteeing the best possible return on your investment.
What to Look For Before Cleaning
Before starting, it's important to assess what needs to be removed, as this will determine the appropriate cleaning method. A systematic check ensures you clean effectively and safely.
- Loose Debris: Look for leaves, twigs, and light dust. This type of debris is often the easiest to remove and may only require a gentle rinse or a soft brush.
- Caked-on Grime: Identify stubborn substances like bird droppings, hardened pollen, or greasy pollution residue. These require more attention and may need pre-soaking with water to loosen them without damaging the panel surface.
- Regional Specifics: Consider your environment. Desert installations, like those common in Nevada, often battle fine dust that requires bi-weekly attention. In agricultural areas, you might find more pollen and organic matter.
- Water Stains: In areas with hard water, mineral deposits can be left behind after rain evaporates. These can be difficult to remove and may require specialized cleaning techniques or deionized water.
Implementation and Best Practices
To properly clean your panels without causing damage, follow a safe and methodical process. Major manufacturers like SunPower emphasize gentle techniques to protect the anti-reflective coating on the glass.
Pro Tip: Always clean your panels during the early morning or late evening when they are cool. Applying cold water to hot panels can cause thermal shock, potentially cracking the glass.
The following infographic outlines the recommended safe cleaning process.
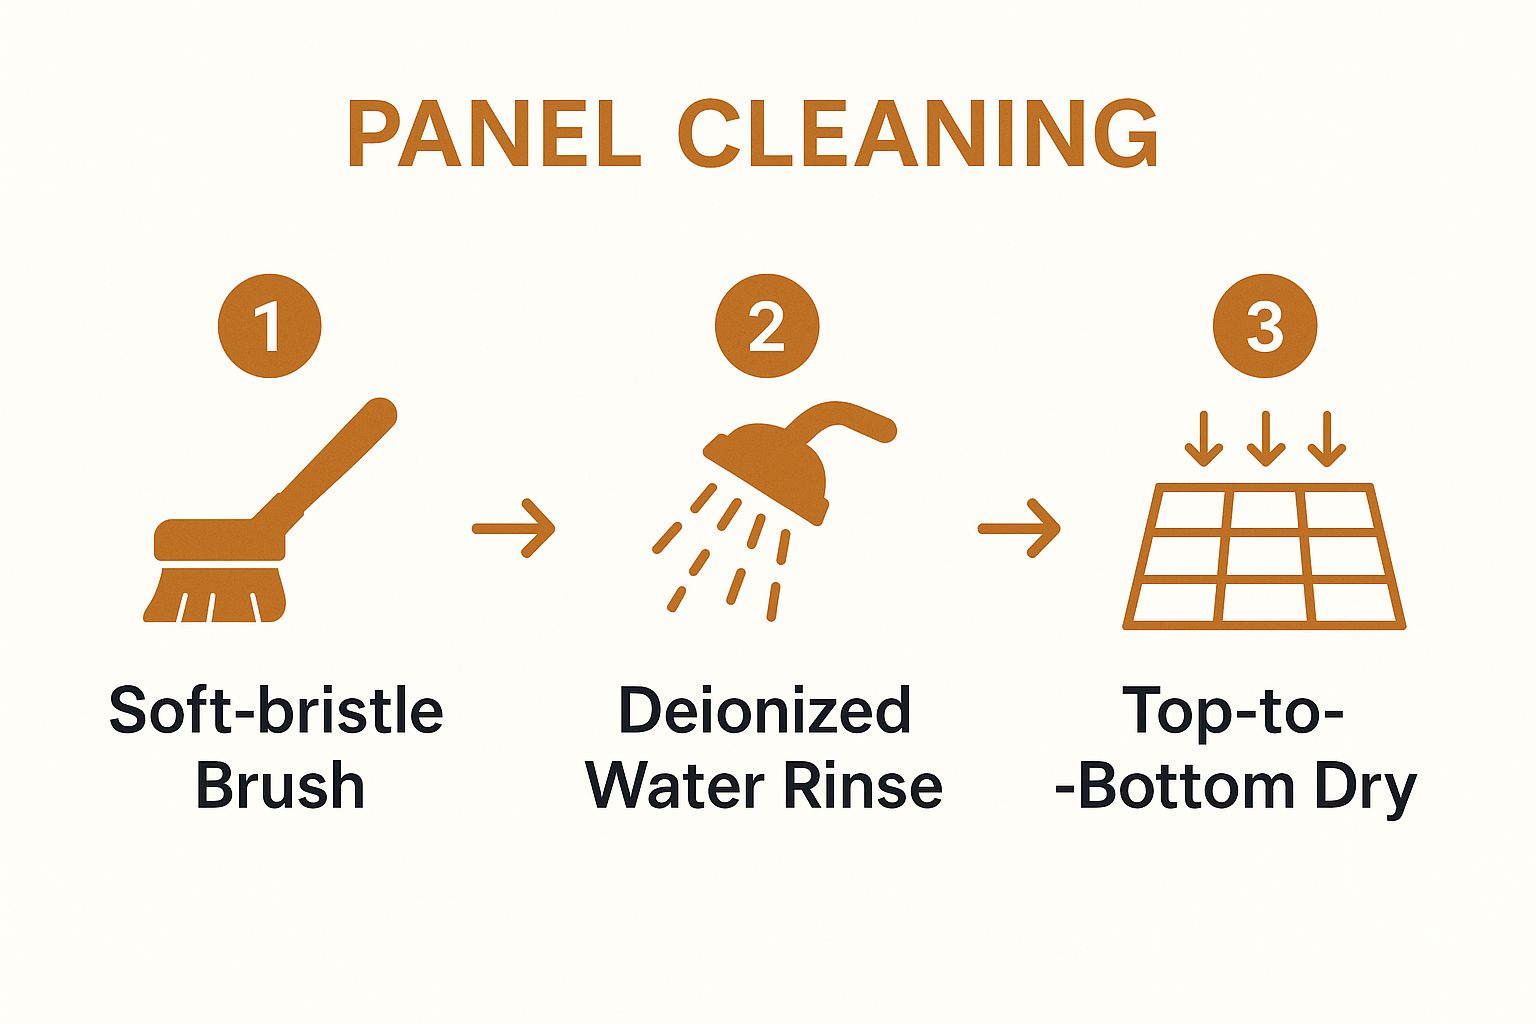
This simple, sequential workflow ensures that panels are cleaned effectively without risking scratches or streaks that could impair performance. Never use a high-pressure washer or abrasive detergents, as these can permanently damage the panel surface and void your warranty. While utility-scale plants like Ivanpah Solar use automated robots, for most homeowners, a soft-bristle brush with an extension pole and a standard garden hose are sufficient. For a more detailed guide on the cleaning process, you can learn more about how to clean solar panels on radiantenergysolar.com.
3. Electrical Connection and Wiring Inspection
Beyond the physical structure of your panels lies the critical network that turns sunlight into usable power. A systematic inspection of all electrical connections and wiring is a non-negotiable part of any solar panel maintenance checklist. This task focuses on ensuring the safe, efficient, and uninterrupted transmission of energy from your panels to your home, identifying potential fire hazards or performance bottlenecks before they become serious problems.
This inspection is more than just checking if the lights are on; it's a deep dive into the health of your system's nervous system. It covers everything from the DC connections on the roof to the AC connections at your inverter and main service panel. Loose connections, corroded terminals, or damaged insulation can lead to significant energy loss, system shutdowns, and, in worst-case scenarios, dangerous electrical arcs. Regular verification ensures every component is secure and functioning as designed.

What to Look For During Your Inspection
A professional should conduct this inspection, but as a homeowner, you can visually assess accessible components for obvious signs of trouble. This process should be methodical, covering every major electrical point in the system.
- Inverter and Combiner Box: Check the inverter for any fault codes or warning lights, as these are direct indicators of electrical issues. Visually inspect the inside of the combiner box (if accessible and safe) for signs of moisture intrusion, corrosion, or melted/burnt wires.
- Wiring and Conduit: Examine all visible wiring for damage. Look for chew marks from rodents, cracked or frayed insulation, and unsecured conduits. Ensure all connections appear tight and are not exposed to the elements.
- Connections and Terminals: Professionals will check the torque on terminal connections to ensure they meet manufacturer specifications. Loose connections are a primary cause of overheating and arc faults, which can lead to significant drops in energy production and pose a fire risk.
- Grounding System: Verify that the system's grounding equipment is intact and securely connected. A proper ground is a crucial safety feature that protects against electrical surges and faults.
Implementation and Best Practices
Organizations like the North American Board of Certified Energy Practitioners (NABCEP) advocate for annual professional electrical inspections to maintain system safety and integrity. Similarly, the National Electrical Code often requires these checks for commercial installations, a best practice residential owners should adopt. For comprehensive guidelines on maintaining electrical components, you can refer to a dedicated SOP for Electrical Maintenance Department.
Pro Tip: Schedule professional electrical inspections during periods of low sunlight, such as early morning or a cloudy day. This minimizes energy production loss while the system is temporarily shut down for safe maintenance.
Always keep detailed records of any inspections, including readings, torque values, and photos of any issues found. For example, modern systems with Enphase microinverters offer real-time monitoring of each panel's electrical connection, allowing for immediate digital detection of many issues. This log is invaluable for tracking system health over time and for any warranty claims.
4. Inverter Performance Monitoring and Testing
While solar panels are the face of your renewable energy system, the inverter is its hardworking brain. This critical component converts the direct current (DC) electricity generated by your panels into the alternating current (AC) electricity that powers your home. An effective solar panel maintenance checklist must include regular inverter monitoring to ensure this vital conversion process is happening efficiently and without interruption.
Monitoring your inverter’s performance is the most direct way to track your system’s overall health and energy output. A malfunctioning or underperforming inverter can silently cripple your energy production, turning your high-value asset into a passive rooftop ornament. By regularly testing and analyzing its data, you can catch performance degradation early, diagnose issues, and ensure you're getting the maximum return on your solar investment.
What to Look For During Your Inspection
Modern inverters, especially from leading manufacturers like SMA Solar Technology and Enphase Energy, provide sophisticated monitoring platforms. Your goal is to use this data to identify anomalies that signal a problem.
- Production Drops: The most obvious sign of trouble is a sudden, unexplained drop in energy production. Compare your current output to historical data from the same time of year. A significant dip that isn't caused by cloudy weather points to a potential inverter issue.
- Frequent Shutdowns or Faults: Check the inverter’s event log or status display for recurring error codes or system shutdowns. While occasional restarts can be normal, frequent faults indicate a persistent problem that needs professional diagnosis.
- Performance Discrepancies: Compare the actual energy output with the expected output projected by your monitoring software. Many platforms, like the one included with a Tesla Powerwall, show this comparison clearly. Consistent underperformance suggests reduced inverter efficiency.
- Physical Signs: Listen for unusual humming or buzzing sounds coming from the unit. Check that cooling fans are operational and vents are clear of debris, as overheating is a common cause of inverter failure.
Implementation and Best Practices
Integrating inverter monitoring into your routine is simpler than ever with modern technology. Most systems come with dedicated mobile apps or web portals that make daily or weekly checks quick and easy. For a deeper understanding of how these devices function, you can learn more about what solar inverters are and how they work.
Pro Tip: Set up automated alerts within your inverter's monitoring app. Configure notifications for significant performance deviations or system faults so you are immediately aware of any issues without having to check manually every day.
Keep your inverter’s firmware updated according to the manufacturer's recommendations. These updates often include performance enhancements and critical bug fixes that improve efficiency and reliability. Regular checks, combined with proactive updates, form a powerful strategy for maintaining the heart of your solar energy system and are a non-negotiable part of any comprehensive solar panel maintenance checklist.
5. Mounting System and Structural Integrity Check
Beyond the panels themselves, the underlying mounting system is the unsung hero of your solar array, providing the structural foundation that holds everything securely in place. A dedicated check of this system's integrity is a critical, yet often overlooked, part of any comprehensive solar panel maintenance checklist. This task involves scrutinizing the rails, clamps, bolts, and all connections that fasten your panels to your roof, ensuring they remain robust and weather-resistant.
The mounting hardware is constantly exposed to the elements, including high winds, heavy rain, and thermal expansion and contraction. Over time, these forces can cause components to loosen, corrode, or shift, compromising the safety and stability of the entire system. A thorough structural integrity check prevents potential disasters like dislodged panels and protects your roof from water damage, making it an essential step for long-term reliability.
What to Look For During Your Inspection
A systematic check of the mounting hardware ensures no weak points are missed. Focus on the physical condition and security of every component holding your panels.
- Hardware Security: Carefully examine all visible bolts, nuts, and clamps. Check if any appear loose, missing, or have shifted from their original position. Even a single loose clamp can create a stress point that compromises the entire rack during a high-wind event.
- Corrosion and Metal Fatigue: Inspect all metal components, including rails and brackets, for signs of rust, corrosion, or pitting. Pay close attention to areas where different metals meet, as galvanic corrosion can occur. Also look for any signs of cracking or bending, which could indicate metal fatigue.
- Roof Penetrations and Flashing: For roof-mounted systems, check the integrity of the flashing and seals around every mounting point. Look for cracked sealant, gaps, or signs of water intrusion like staining on your ceiling or in the attic. Proper drainage around these points is vital to prevent leaks.
- Panel Alignment: Observe the array as a whole. Do the panels still appear to be in a straight, uniform line? Any sagging, tilting, or noticeable misalignment could be a symptom of a failing mounting component or a shift in the underlying structure.
Implementation and Best Practices
The frequency of this check should be determined by your local climate. For instance, homeowners in hurricane-prone regions like Florida should perform this inspection before and after storm season. Leading manufacturers like IronRidge and Quick Mount PV provide detailed maintenance protocols that are excellent resources for homeowners.
Pro Tip: Use a torque wrench to spot-check a few accessible bolts to ensure they meet the manufacturer's specified tightness. Do not overtighten, as this can damage the hardware or the panel frame.
Always document the condition of your mounting system with dated photos, especially after severe weather. This creates a clear record for professional review and is invaluable for warranty claims. If you notice any significant issues like widespread corrosion or loose hardware, contact a certified solar installer immediately to perform a professional assessment and make necessary repairs.
6. Performance Data Analysis and Energy Output Tracking
Beyond physical checks, the most insightful part of any modern solar panel maintenance checklist is the analysis of performance data. This involves systematically tracking your system's energy production to establish a clear baseline, identify subtle performance degradation, and make informed maintenance decisions. By monitoring the numbers, you can spot efficiency losses that are invisible to the naked eye.
This data-driven approach transforms maintenance from a reactive task into a proactive strategy. It allows you to understand how your system performs under different conditions and detect issues like inverter malfunctions or shading problems long before they significantly impact your energy bills. Consistent energy output tracking is the key to ensuring your solar investment delivers the financial and environmental returns you expect.
What to Look For During Your Analysis
Your analysis should go beyond just looking at the daily kilowatt-hour (kWh) number. A methodical approach involves comparing current output to historical data and external factors to uncover meaningful trends.
- Establish a Baseline: The first year of operation is crucial for establishing a performance baseline. Record the monthly and seasonal energy production to understand your system's expected output throughout the year. This baseline becomes the benchmark for all future comparisons.
- Identify Gradual Declines: Solar panels naturally degrade at a slow rate (typically 0.5% per year). Your analysis should look for degradation that exceeds this expected rate. A sudden or accelerated drop in output can signal underlying problems like panel soiling, equipment failure, or new shading obstructions.
- Compare to Weather Data: Production is directly tied to sunlight. Compare your system’s output against local weather data (e.g., hours of sunshine, cloud cover). A significant drop in production on a clear, sunny day is a red flag that warrants investigation.
- Check Inverter Performance: The inverter is the brain of your solar system. Many solar monitoring systems provide specific data on inverter efficiency and report fault codes. Regularly check this data for any error messages or signs of underperformance.
Implementation and Best Practices
Most modern solar installations come with a dedicated monitoring app or web portal that makes data tracking simple. Large-scale operations, like those tracked by the National Renewable Energy Laboratory (NREL), use sophisticated software to monitor thousands of systems, but the principles are the same for homeowners.
Pro Tip: Create a simple spreadsheet to log your system's energy production at the end of each month. Note any significant weather events or maintenance activities. This historical log will be invaluable for spotting long-term trends and troubleshooting issues.
Set performance thresholds to trigger alerts. For instance, if your system's output drops more than 15% below the historical average for a given month (after accounting for weather), it's time to schedule a professional inspection. Beyond just tracking raw output, understanding how to apply a robust framework for performance measurement is key to maximizing your solar investment. For a deeper dive, consider this guide to operational efficiency metrics. This level of analysis ensures your system operates at peak efficiency year after year.
6-Point Solar Panel Maintenance Comparison
| Maintenance Task | Frequency | DIY/Pro | Impact on Performance | Common Issues Detected |
|---|---|---|---|---|
| Visual Inspection | Monthly | DIY | Low | Cracks, discoloration, loose parts |
| Panel Cleaning | 1-2x/Year | DIY | High | Dirt, pollen, bird droppings |
| Wiring Inspection | Annually | Pro | High | Frayed wires, corrosion, loose connections |
| Inverter Monitoring | Weekly | DIY | Critical | Fault codes, production drops |
| Mounting Check | Annually | Pro | Medium | Loose bolts, rust, roof leaks |
| Data Analysis | Monthly | DIY | High | Gradual degradation, underperformance |
Keep Your Solar Investment Shining Bright
Investing in a solar panel system is a significant step towards energy independence, lower utility bills, and a more sustainable lifestyle. However, the journey doesn't end with installation. Just like any high-performance asset, your solar array requires consistent care to deliver the returns you expect. This detailed solar panel maintenance checklist moves you from being a passive energy consumer to an active, empowered system owner, ensuring your investment continues to operate at peak efficiency for decades.
By diligently following the steps we've outlined, you transform maintenance from a chore into a powerful strategy for asset protection. Regular visual inspections catch physical damage early, cleaning restores lost efficiency from grime and debris, and meticulous wiring checks prevent dangerous electrical faults. Monitoring your inverter and analyzing performance data are not just technical tasks; they are your direct line of sight into the health and productivity of your system.
From Checklist to Long-Term Value
The true value of this checklist lies in its proactive approach. Instead of waiting for a sudden drop in energy production or a critical system error, you are equipped to identify and address minor issues before they escalate into costly repairs. Think of it as preventative care for your home's power plant. Each task, from tightening a loose mounting bolt to tracking kilowatt-hour output against seasonal expectations, contributes to the overall longevity and safety of your solar array.
This proactive stance directly translates into tangible financial benefits:
- Maximized Energy Production: A clean, well-maintained system consistently produces more power, leading to greater savings on your electricity bills and a faster return on your initial investment.
- Extended System Lifespan: By preventing premature wear and tear on components like panels, inverters, and racking, you can help your system meet or even exceed its projected 25 to 30-year lifespan.
- Enhanced Safety: Regular electrical and structural integrity checks are crucial for protecting your property and family from potential hazards like short circuits, fire risks, or damage from loose hardware.
Ultimately, mastering this solar panel maintenance checklist is about safeguarding your investment and ensuring the continuous, reliable flow of clean energy. While many homeowners can confidently handle routine cleaning and visual checks, the more technical aspects demand professional expertise. Knowing when to call in a certified technician for electrical inspections or in-depth performance diagnostics is a key part of responsible system ownership. By embracing this balanced approach of DIY care and professional support, you ensure your solar panels will keep shining brightly, powering your home and your future for years to come.
Ready to take the guesswork out of solar maintenance and ensure your system is in expert hands? The certified professionals at Radiant Energy offer comprehensive maintenance plans that cover every item on this checklist, from detailed inspections to performance optimization. Visit Radiant Energy today to schedule a consultation and protect your clean energy investment.